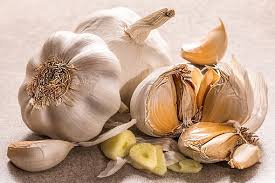
I’ve been going through the garlic I harvested in July. Damaged or diseased bulbs are salvaged for immediate use in salsa or sautes, cut and dehydrated for garlic powder( thanks Suzanne Capone!) or tossed. The best heads are set aside for replanting in October. Small heads can be set aside and planted for garlic scallions.
In our climate, early to mid October is garlic planting time. You want the bulbs to put on enough root and leaf growth before bulbs start to form, but not so much that they are prone to frost damage. Bulb formation starts as soon as daylight exceeds 13 hours. Getting off to a good start in the fall is key to having nice bulbs. Garlic likes lots of organic matter, adequate P and K and 30-60# of actual N per acre. Use the handy fertilizer calculator to figure what to add to your beds. https://independencefarmersmarket.org/2018/01/fertilizer-calculator/
Take your biggest heads and separate the cloves. It’s okay if the skin comes off. If you’ve had disease problems you can use a pre-plant treatment. Mites have been my problem. I soak the cloves overnight in water with 1 Tablespoon baking soda and 1 teaspoon maxicrop powder per gallon. Drain the cloves right before planting and put in rubbing alcohol for 3-5 minutes. Then plant.
Plant garlic 3 rows to the bed with 6-10 inches in the row. I usually go with an 8″ spacing. Elephant garlic needs more room: 2 rows per bed and 10-12 in the row. Make sure you have 3-4 inches of soil above the top of the clove and be sure to plant point up. It can effect yield by 30%! If you have lots of very small cloves, plant them about 1 inch apart and grow garlic scallions! regardless of the variety, cover with 4-6 inches of straw. Once you notice the leaves poking up, you may need to help them get through the mulch.
Need more information? Check out Pam Dawling’s great slide show here https://www.sustainablemarketfarming.com/2016/03/21/garlic-slide-show-mother-earth-news-fair-louisa-backyard-gardeners-workshops-seeds-germinating/
